If you’re shopping for an affordable record player to tide you over until you can build out your dream setup, you’ve probably noticed something frustrating: online reviews are full of complaints from people who seem to expect turntables to work like streaming services. The truth is, any decent turntable needs some initial setup, but when we know what we are dealing with, it becomes easy. A decent entry-level turntable with replaceable stylus and a proper counterweight can deliver solid sound without breaking the bank.
There is something meditative about the ritual of setting up the turntable. The good news is that turntable setup is not mysterious magic – it’s a series of logical, repeatable steps grounded in physics and good mechanical practice. This guide walks you through the entire process.
Let’s dig in.
Why Setup Matters
Before we go into the setup, let’s understand the different parts of the turntable.
- Motor spins at a precise speed with a very high RPM (revolutions per minute).
- The Platter is connected to motor and the ratio is adjusted in such a way that it spins at the correct RPM that the record needs.
- Stylus is the needle that physically tracks the grooves causing motion.
- Cartridge converts the analog motions into electrical signals.
- Tonearm carries the cartridge and stylus from one groove to another.
- Some models contains a pre-amplifier that can magnify the electrical signals.
Each of these components must work in harmony to give a perfect audio sound. A motor that runs fast but jittery will make the record sound unstable. A tonearm set with the wrong counterweight will either drag on the record or fail to track the inner grooves. A cartridge whose azimuth is off will throw off the stereo image and add distortion. So, initial setup is key so that you can hear the audio as the artist intended you to hear.
Types of Drives
The foundation of any turntable is how it gets the platter spinning. There are primarily two different types of drives (however more high-end players also use a third type (Linear Direct-Drive that we will omit).
Belt-Driven Turntables
Traditionally turntables used belt-drive design to spin the platter. In a belt-driven turntable, a small electric motor spins a pulley via a rubber belt, which in turn drives a larger pulley mounted on the platter’s spindle.
The biggest advantage of belt drive types is vibration isolation. The rubber belt acts as a mechanical buffer between the motor and the platter – as a result the mechanical vibrations of the motor never reach the platter. Speed adjustment is also easier. Some turntables use a third adjustable spindle that can slow or speed the records by adjusting the gear ratio. The biggest drawback is the wear and tear of the belt eventually causing it to fail. A worn belt will slip and the speed of the platter will be impacted.
Direct-Drive Turntables
The direct-drive design takes a different philosophical approach. Instead of a belt, the motor is physically coupled directly to the platter’s spindle – often through a small gearbox – so the motor’s rotation is transferred to the platter with no intermediary.
The primary advantage is speed control. Since there is no wear like a belt-drive, speed remains consistent. They are a favorite of DJs as the platter can also be started or stopped without delay. There is no maintenance required for direct drive turntables. The biggest downside is transmission of motor vibrations to the platter. The higher quality turntables address with with better motor design, cushioning rings and heavier platter. They also tend to be more expensive than a belt-driven turntable.
Records and Record Speeds
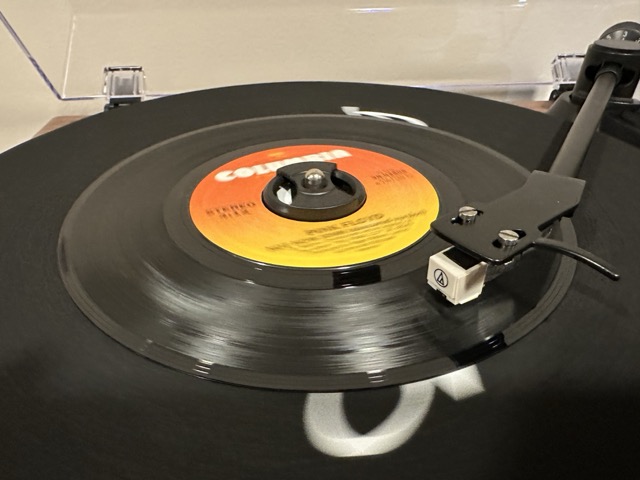
Vinyl records dominate our nostalgic conversations about analog music, but records weren’t always made of vinyl. Initially manufactured from shellac – a natural resin derived from the lac beetle – early records were extremely fragile and could only hold a few minutes of music per side, spinning at 78 RPM. Everything changed in 1948 when Columbia Records introduced vinyl records operating at 33⅓ RPM, which could hold up to 25 minutes per side and were far more durable. Not to be outdone, RCA introduced the 45 RPM single format in 1949, creating two competing standards that both remain in use today. While some turntables support 78 RPM playback, you’ll rarely encounter these shellac records in casual collecting—and if you do, remember that playing old shellac records requires a different stylus altogether, as modern needles are designed for vinyl grooves, not the wider grooves of vintage shellac formats.
Now that all basics are all covered, we will move to the setup part.
Initial Setup
All setup instructions and photos are from a Annesburg record player that I purchased during a deal. It cannot compare with the other Audio Technica turntable, but for the price I thought it delivered what it was supposed to deliver. Anyway, back to the blog.
Getting the belt right (Belt Driven turntables)
The first thing that you have to make sure when you get a belt-driven turntable is put the belt on or in some cases, adjusting the tension of the belt. A poorly seated, overtightened, or mismatched belt will cause speed errors, instability, and even damage to your records.
A belt primarily has three components,
- A motor pulley connected to the motor shaft. This should be easily identifiable as a groove on the motor spindle.
- A platter pulley, which is below the platter. The pulley diameters between the two sets the RPM ratio between the platter and the motor.
- A belt, made of rubber that connects the two.
Belts can be of various types including flat belts or v-shaped belts. For most cheap turntables and some medium end ones also, you will find the flat belts to be more common. v-belts are sometimes provided on high end turntables as with the larger surface area they avoid slippage and provide smoother play.
Make sure the grooves on both motor pulley and platter pulley are clean. Align the belt properly and seat it on the grooves of the two pulleys. You can follow the manufacturer’s instructions for installation. Check proper tension of the belt. Verify that the belt is straight and correctly seated. Finally, give the platter some spins with hand to make sure that the belt is properly installed.
Tonearm Counterweight measurement
Unless you have the cheapest player, you will probably see a dial at the rear end of the tonearm. It is mounted on a rotating shaft and can be turned to change its effective position. The counterweight’s job is to balance the tonearm against the cartridge and the headshell, so that the arm floats at a natural angle without being held up or pushed down by any external force.
When a stylus moves through the groove of the vinyl, it needs a specific weight to be applied. This weight normally measured in grams, will be specified by the stylus manufacturer. A cartridge’s compliance (a measure of how easily its moving parts move) is matched to a target effective mass range. For example, a moving-magnet (MM) cartridge might be designed for an effective mass of 7–12 grams, while a moving-coil (MC) cartridge might be designed for a much lower range of 2–6 grams. When the tonearm’s effective mass matches the cartridge’s design, the system is optimally tuned for frequency response, transient response, and overall fidelity.
Setting too low will result in skips, and setting too high the tracking force you will degrade sound quality, cause distortion, and even increase wear on both the record and the stylus.
Manual Adjustment
Adjust the tonearm so that it floats horizontally. It should not dip down or go up. At this point, set the scale to match 0. This is the free weight of the tonearm. Now based on the manufacturer’s recommendation, turn clockwise to move the tonearm to adjust weight in grams. There should already be markings for gram weights. This will set the tracking force.
Using a Tonearm Scale
The previous method is a crude way of adjusting the weight and it is prone to errors. A better option is to get a tonearm weigh scale. It normally comes with a five grams weight for calibration. Turn the weighing scale on and put on the platter. Zero your initial reading. Now slowly put the tonearm on this scale. Check weight. Adjust the counterweight till you get the desired weight on the scale.
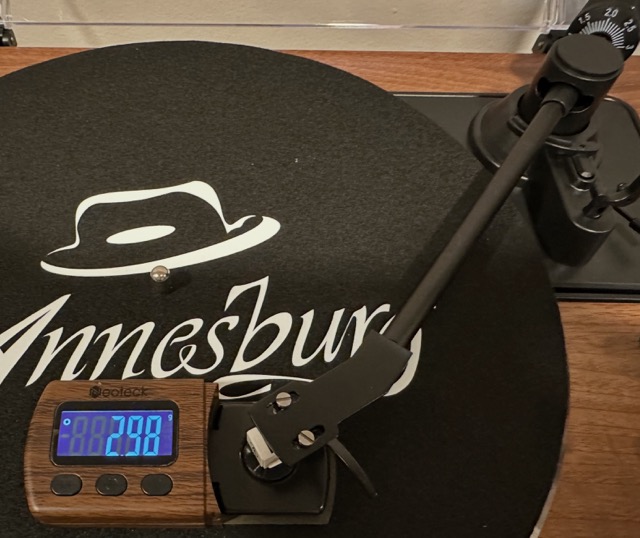
The above two were the basics that needed to be adjusted. Now we come to couple of advanced adjustments.
Cartridge Alignment using Two point protractor
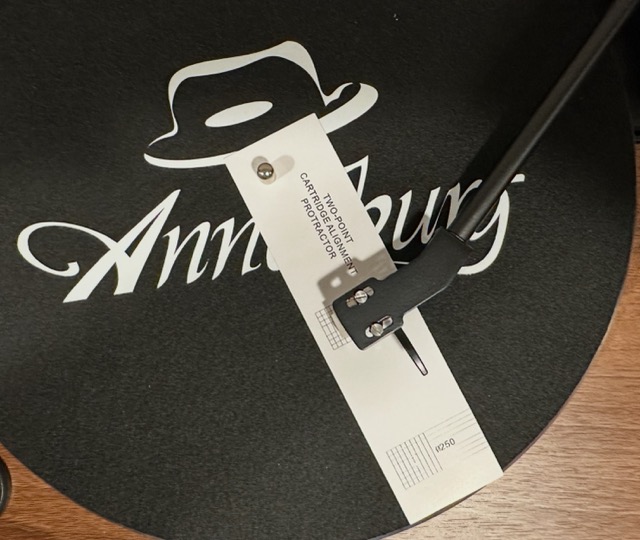
If you think about how a needle tracks in a groove, you will see that the side walls of the groove create a vibration path for the needle, which in turn goes to the cartridge. If the pressure on any of the walls is higher it will cause audio distortion and also wear off the record grooves quicker. The needle has to go through several angles as it tracks the record. The outer angle is not the same as the inner angle formed between the tonearm pillar and the center of the record. To make sure that the alignment is proper on all angles, several different protractors were devised. Most of the turntables will provide you with a protractor.
Setting the correct angle using protractors is as simple as placing the protractor on the platter, placing the tonearm at the two specified points – and looking from top to remove any parallax and verify that cartridge is parallel to the lines drawn. If the alignment has an issue, loosen the cartridge, realign it and measure again. Continue the steps till the cartridge is aligned properly.
Doing this simple step will add more clarity to your audio.
Azimuth Adjustment
The final adjustment you need to do is to check that the needle is vertical. This also helps proper tracking. This process is also easy. Get a small thin mirror and place it on the platter. Now place the needle on top of the mirror.
Look straight ahead at the reflection of the needle on the mirror. If the needle and its reflection form a straight line then you are golden. If not, then you will have to adjust the cartridge head to align the needle.
Conclusion
That’s it. All the basic settings you will need to do before playing songs. Enjoy clear music, and enjoy the warmth of vinyl!